


前言
之前给大家推荐了BuyVM家的机子,支付宝付款只要月付大概16美元,就能得到一台不限流量,G口带宽,256G硬盘的大盘鸡了,非常适合喜欢离线下载的小伙伴。
因为BuyVM是送了IPv6的,不过需要自己手动添加,群里之前有小伙伴在添加过程中遇到了问题,所以这篇帖子就来简单教大家怎么操作。
系统
- Debian 10 (Ubuntu16也可以)
操作
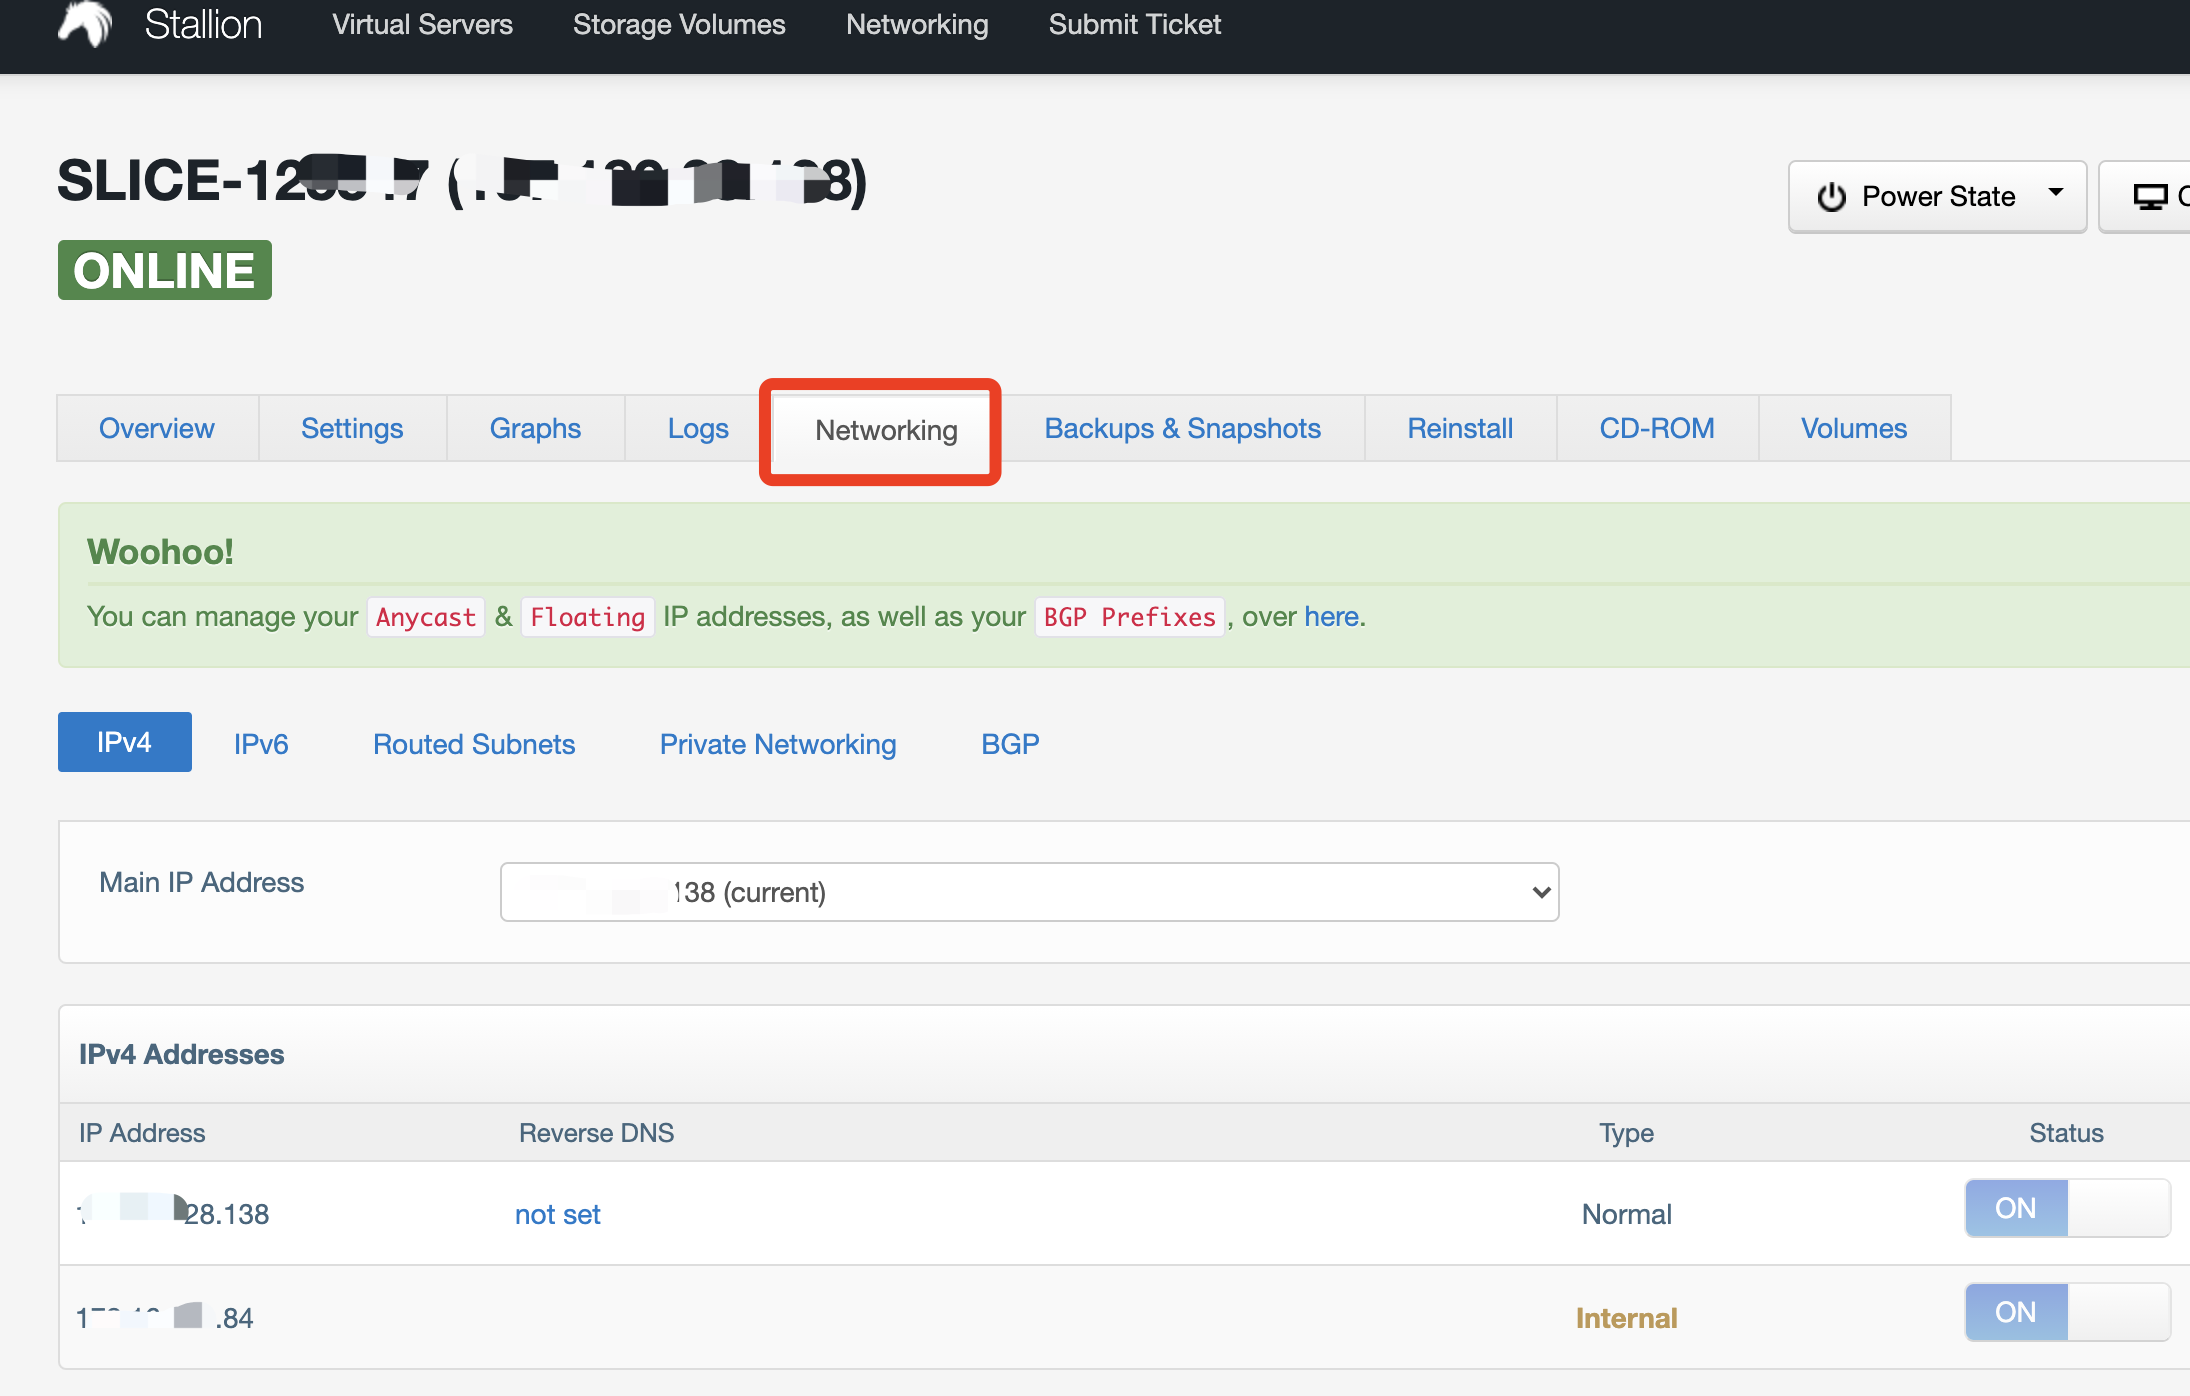
首先登陆后台,点击Networking
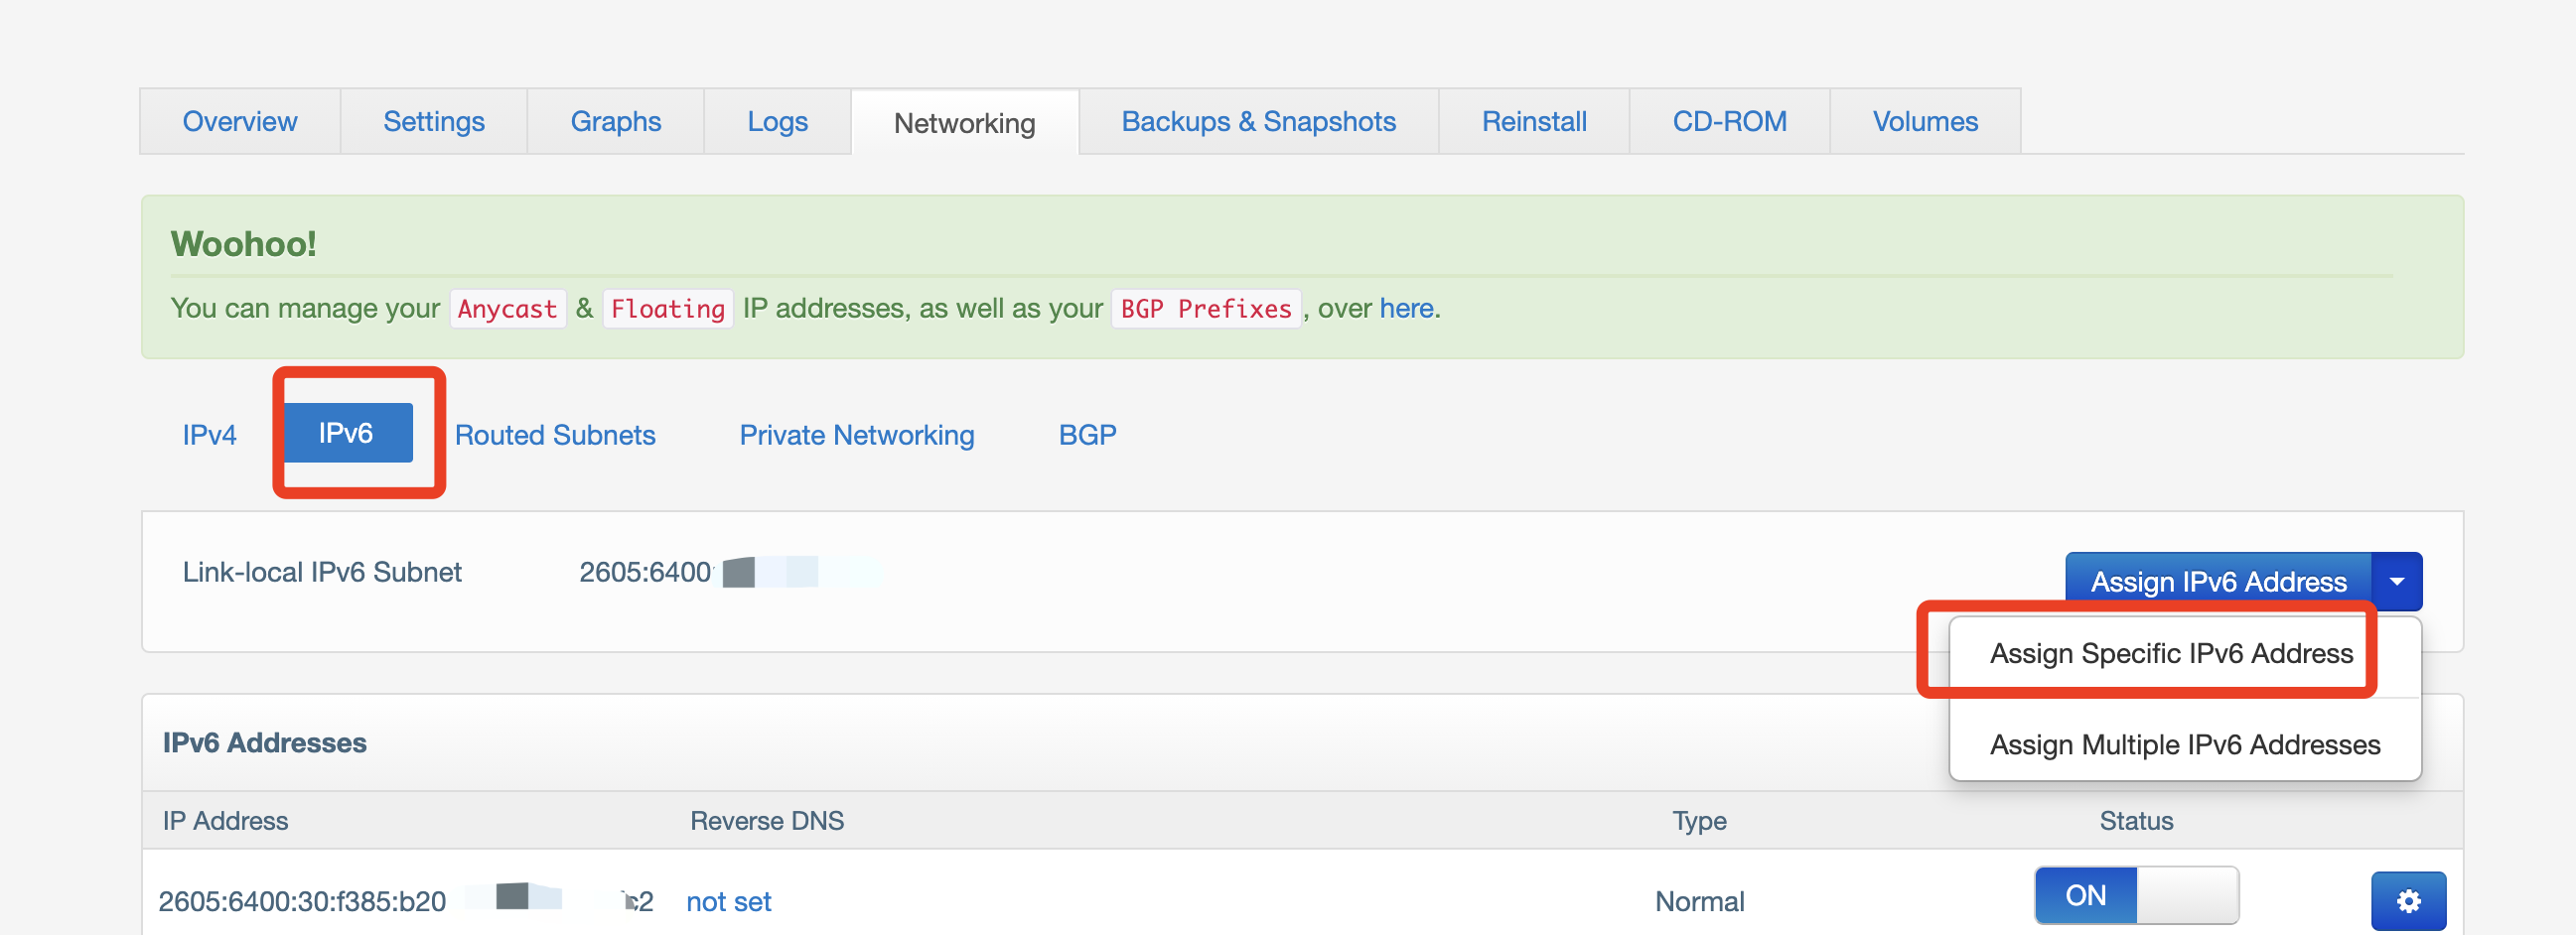
选择IPv6,添加IPv6,
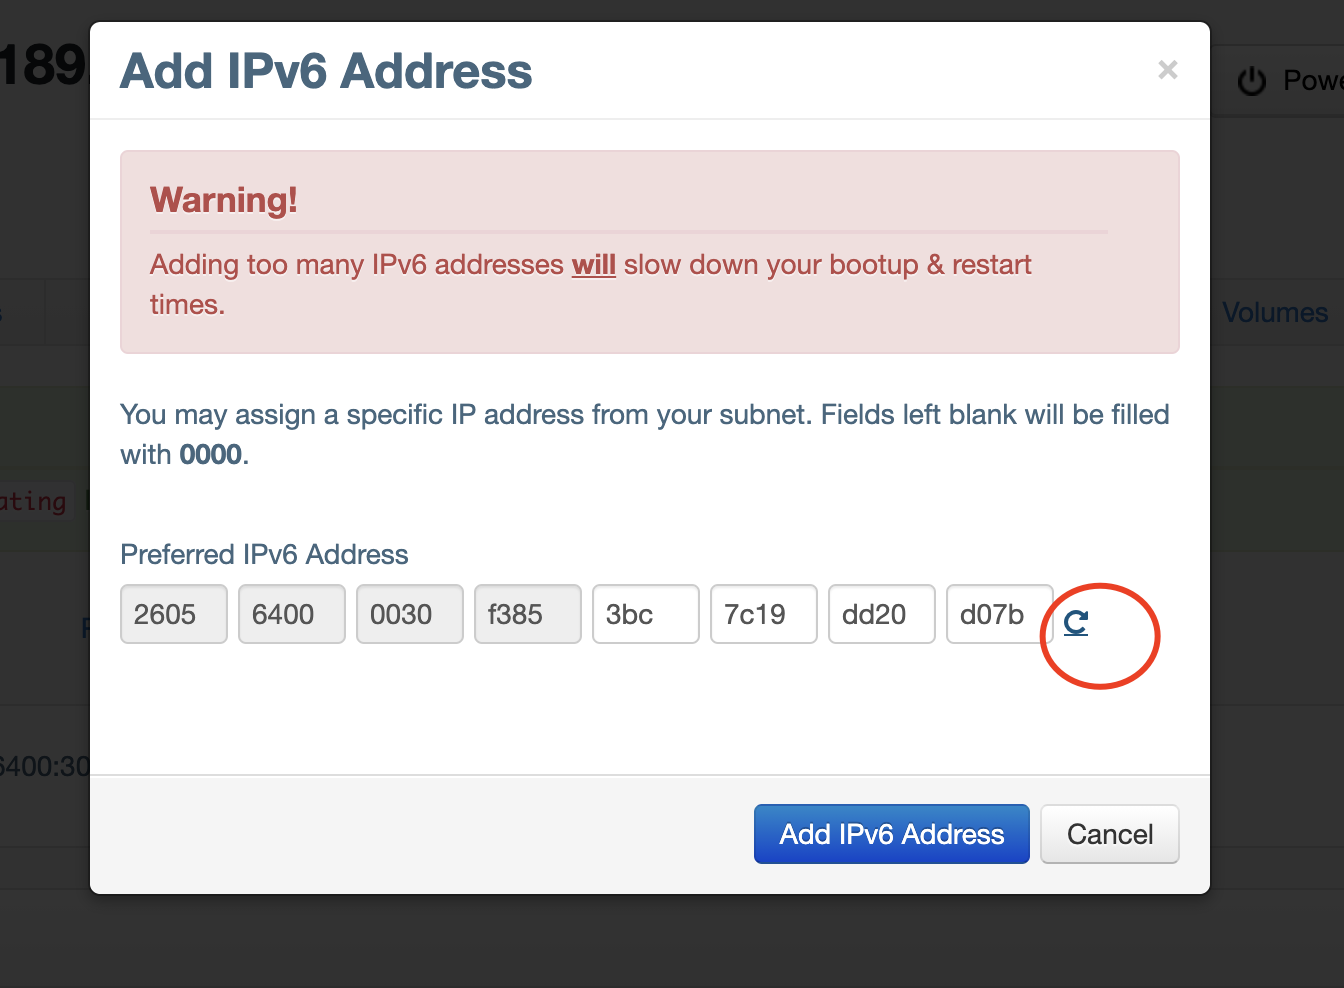
点击右边的这个小按钮,随机生成一个IPv6的地址,
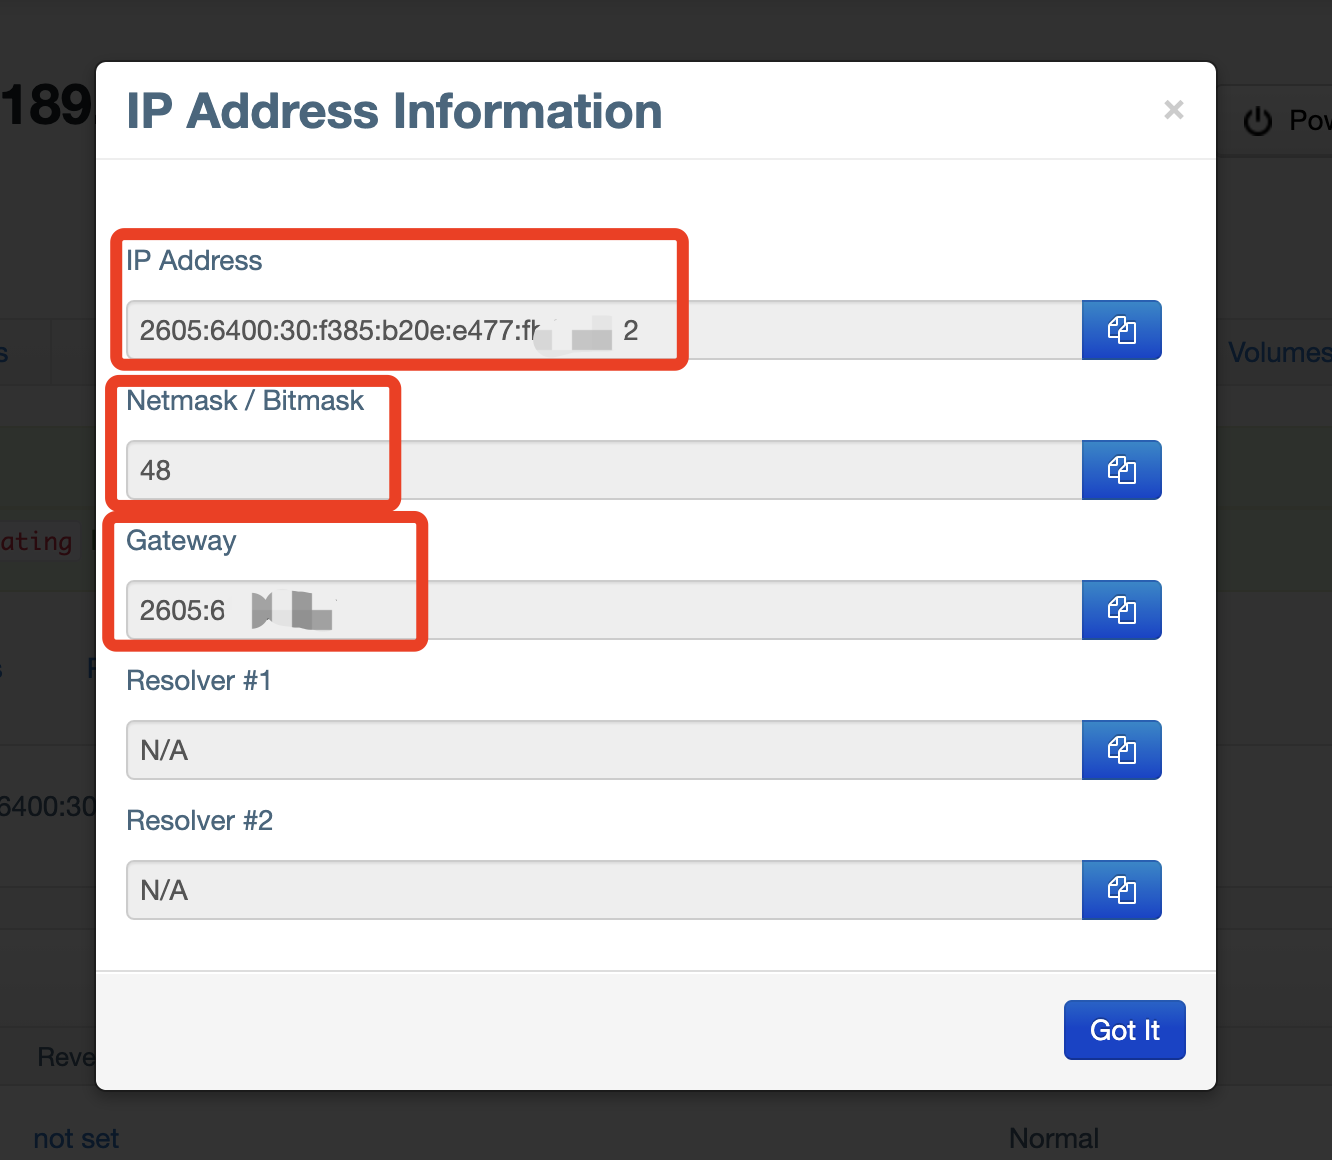
注意这边把IPv6的开关打开,然后点击右边的这个小齿轮,
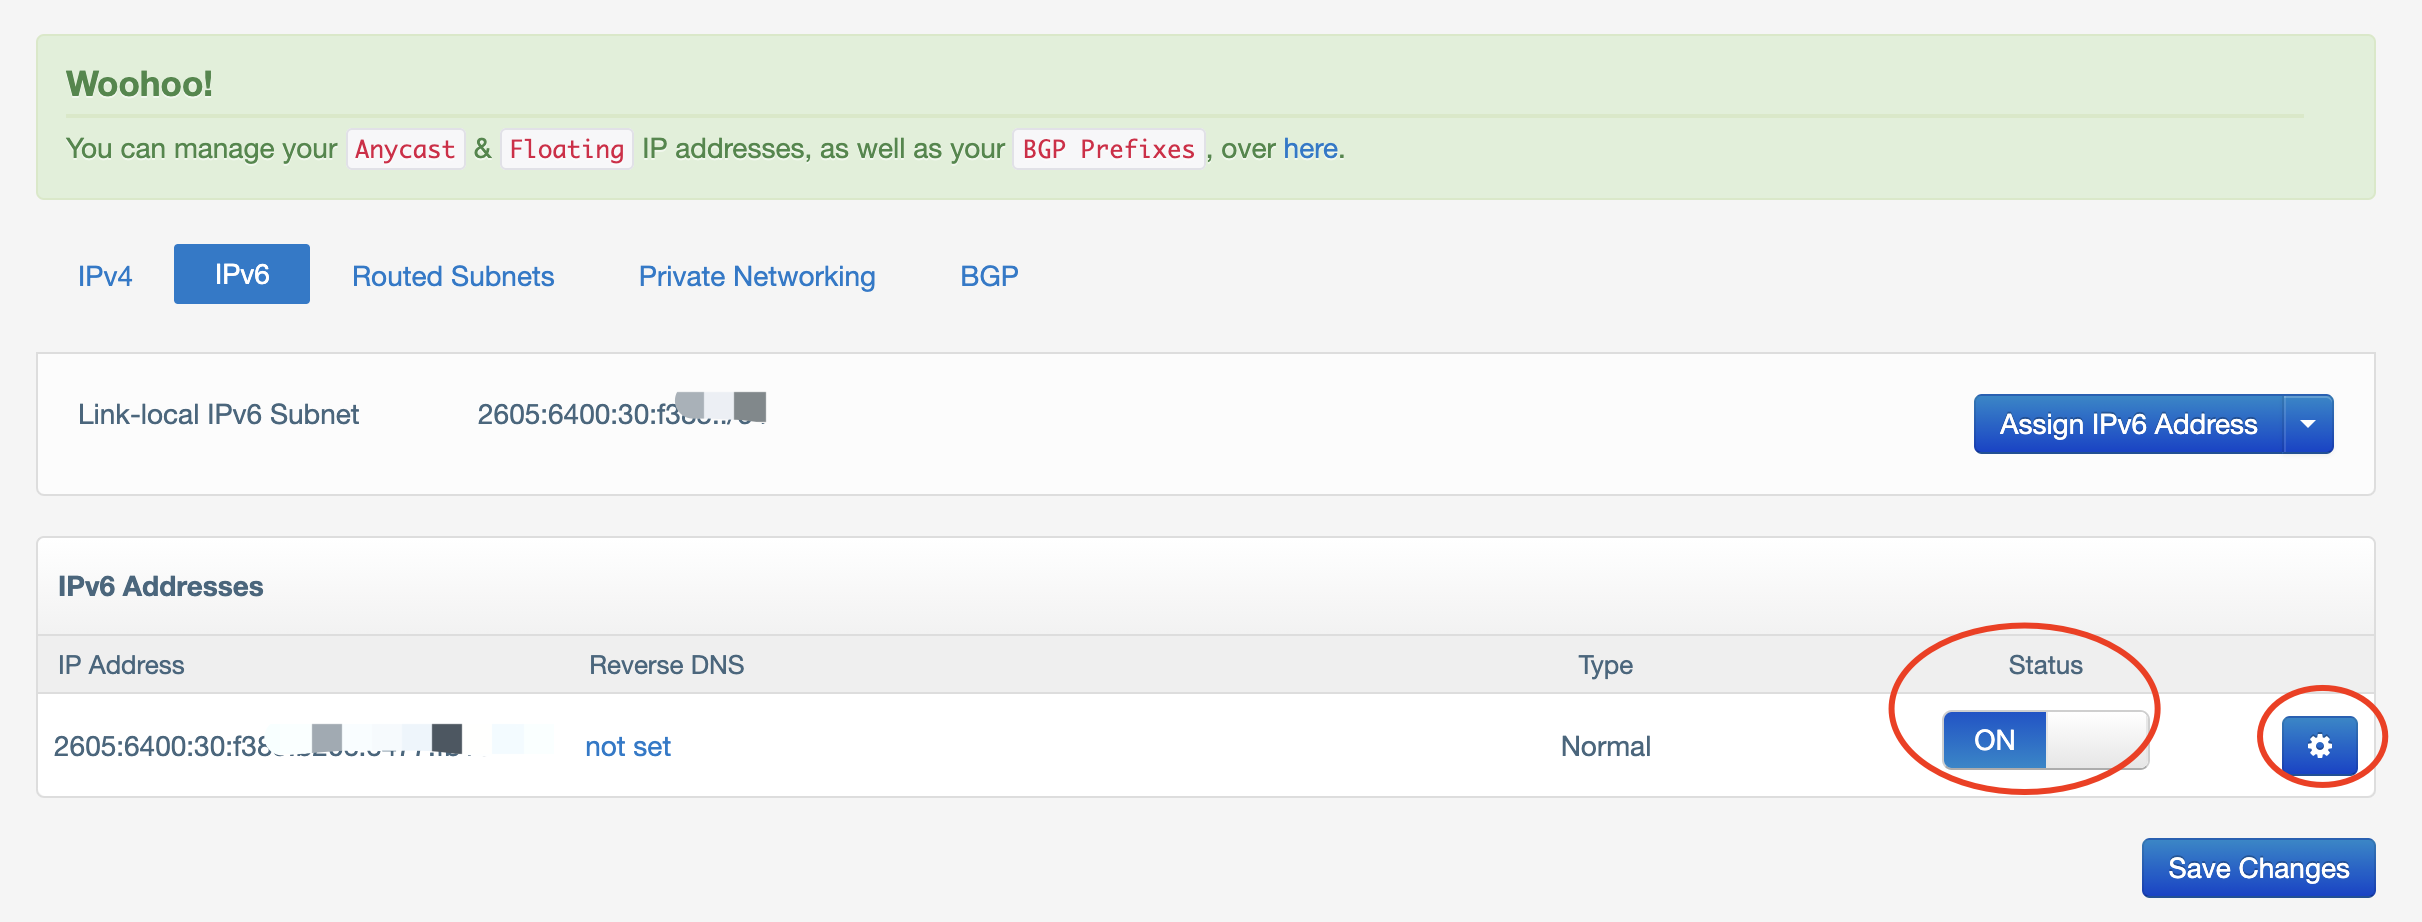
这边能看到我们刚才设置的IPv6地址,我们还需要复制下这边的Netmask/Bitmask和Gateway,
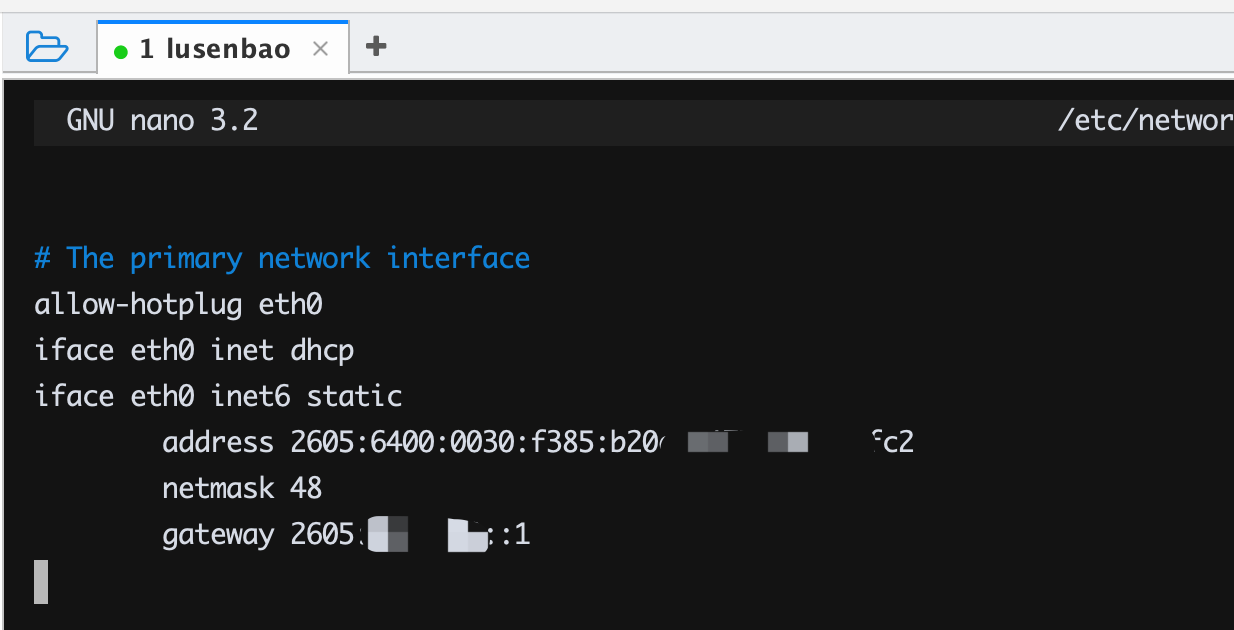
接着,来到命令行,通过SSH连接上服务器,编辑/etc/network/interfaces,
sudo nano /etc/network/interfaces
在文件末尾手动写入地址配置:
iface eth0 inet6 static
        address 分配的IPv6地址(全)
        netmask 查询到的位掩码(一般是48)
        gateway 查询到的IPv6网关地址
然后重启一下,
sudo reboot
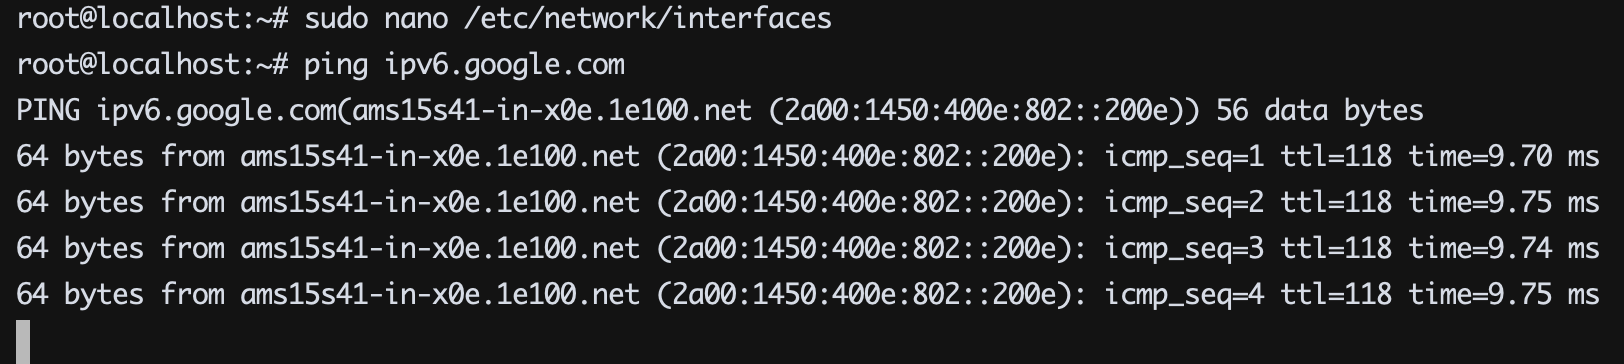
重新登陆后,检测IPv6是否生效,输入:
ping ipv6.google.com
同样,我们输入ping ipv4.google.com看看:
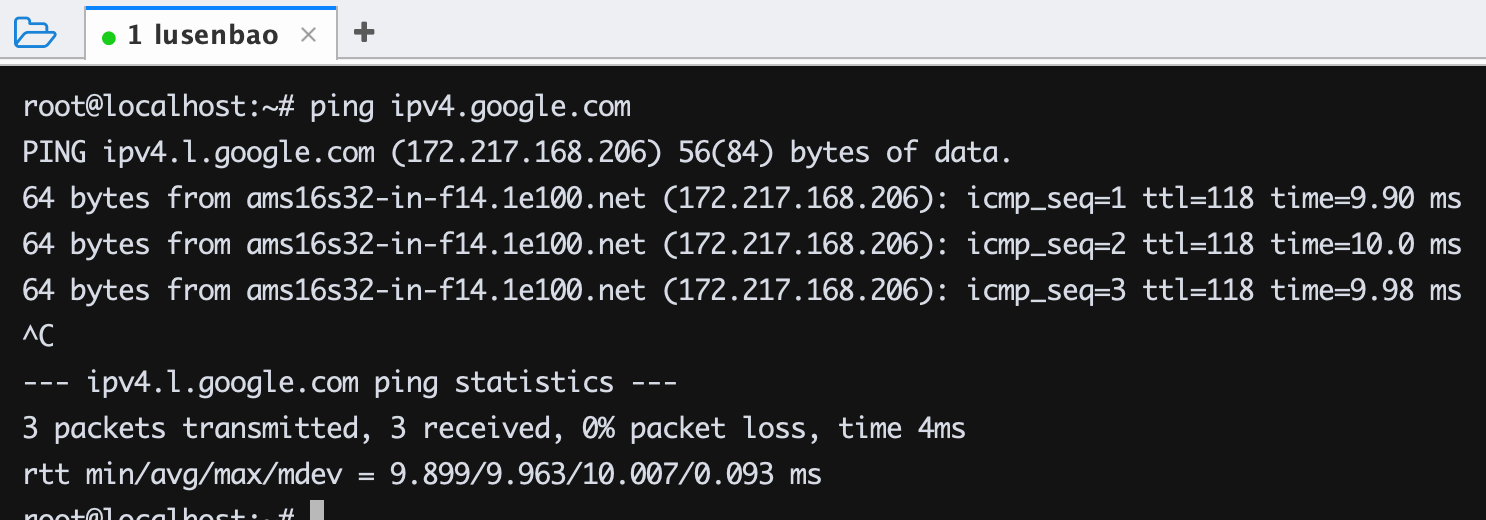
至此,我们的BuyVM已经是IPv4+IPv6的了。


评论区