


示例服务器(腾讯云轻量香港服务器)

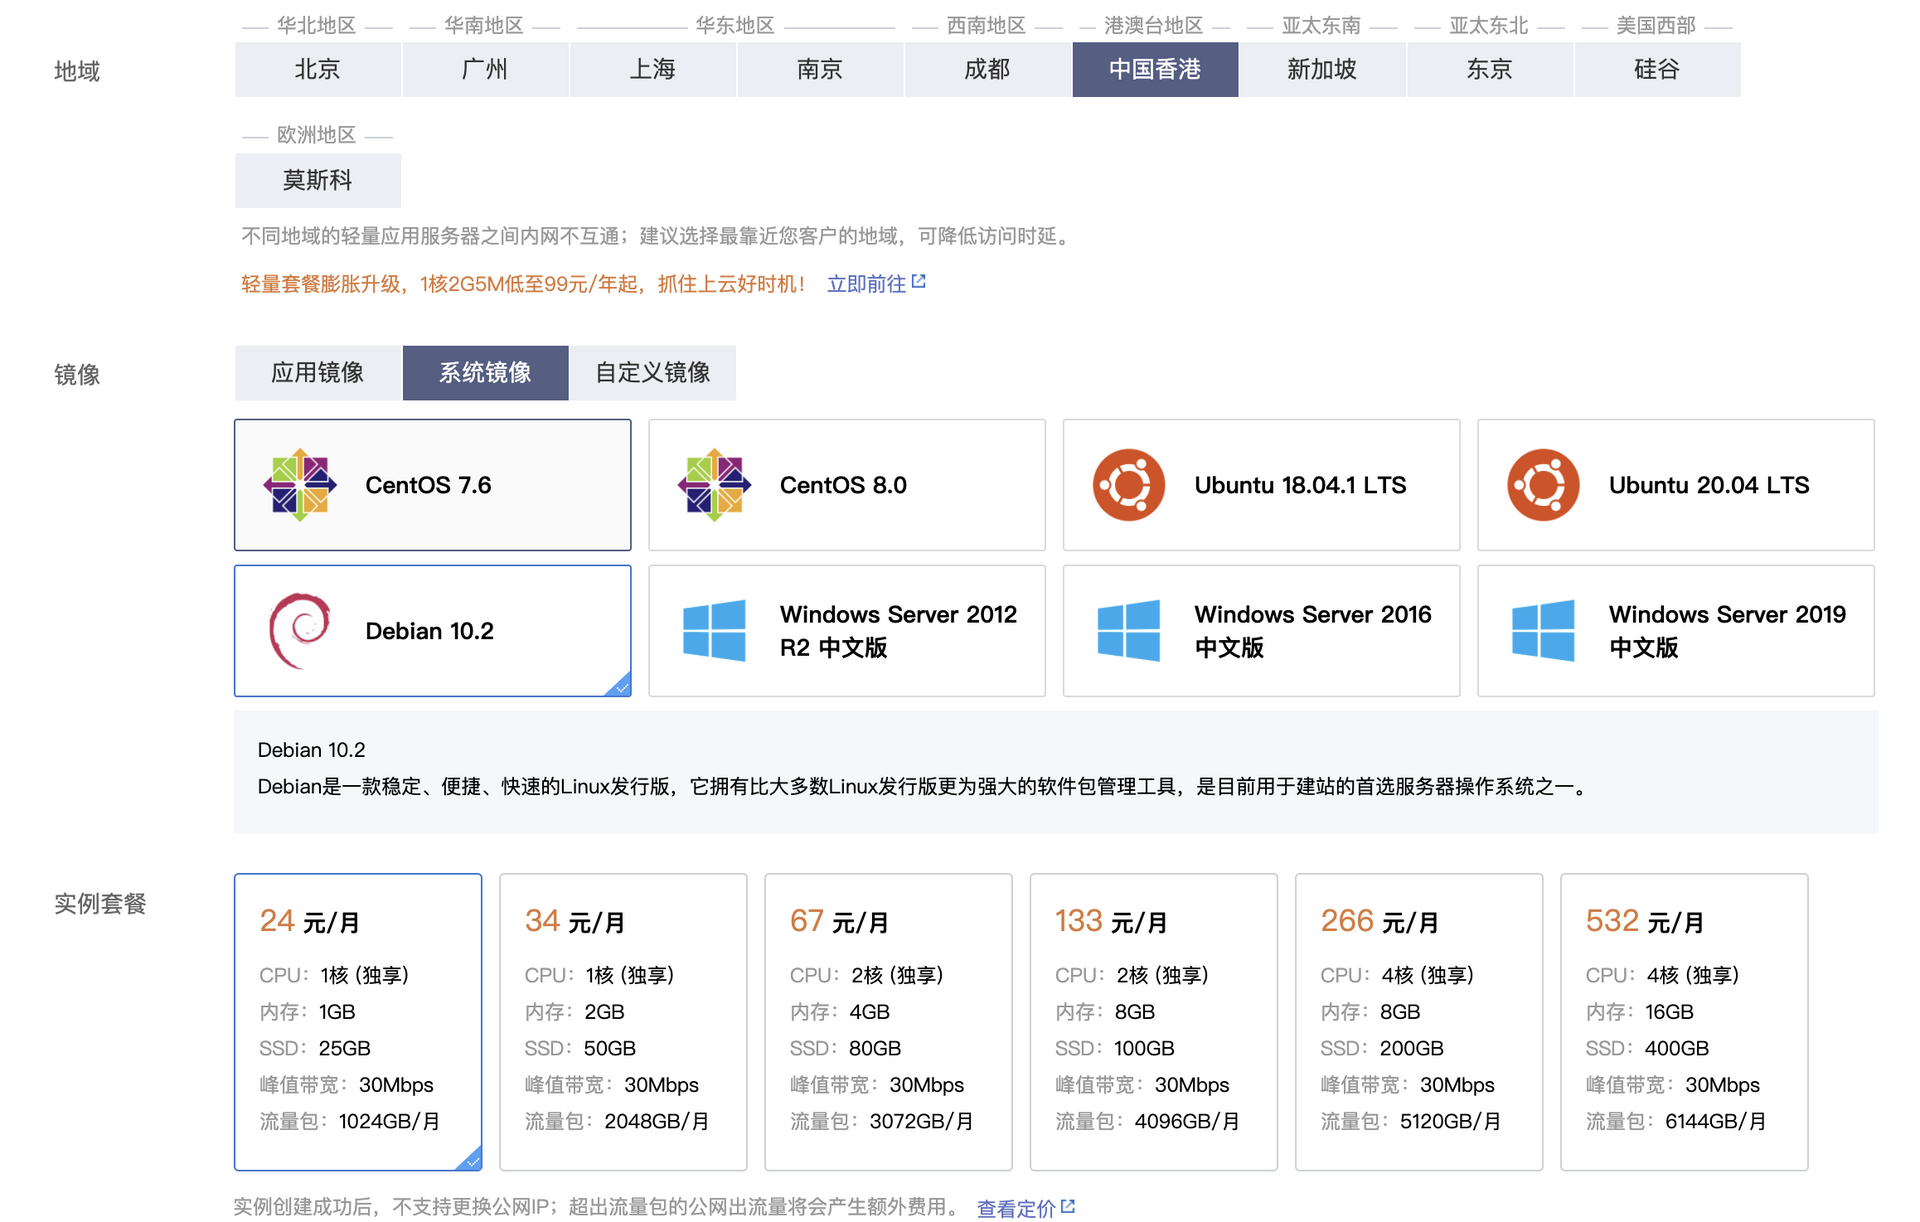
**购买地址:**https://loll.cc/tx
24块/月,CN2 GIA线路,不用备案就可以使用,非常得方便,而且有三个快照,可以随时备份数据。
支持良心云,拒绝套路云! [狗头]
买了记得装Debian系统。
视频演示以Debian10 为例子。
视频教程
完整视频:
更新软件包
apt update
centOS使用如下命令:
yum update -y
安装基础组件
apt install sudo wget curl
centOS:
yum install sudo wget curl
下载宝塔面板(centOS请自行到网站上找相应脚本)
- 海外版本:
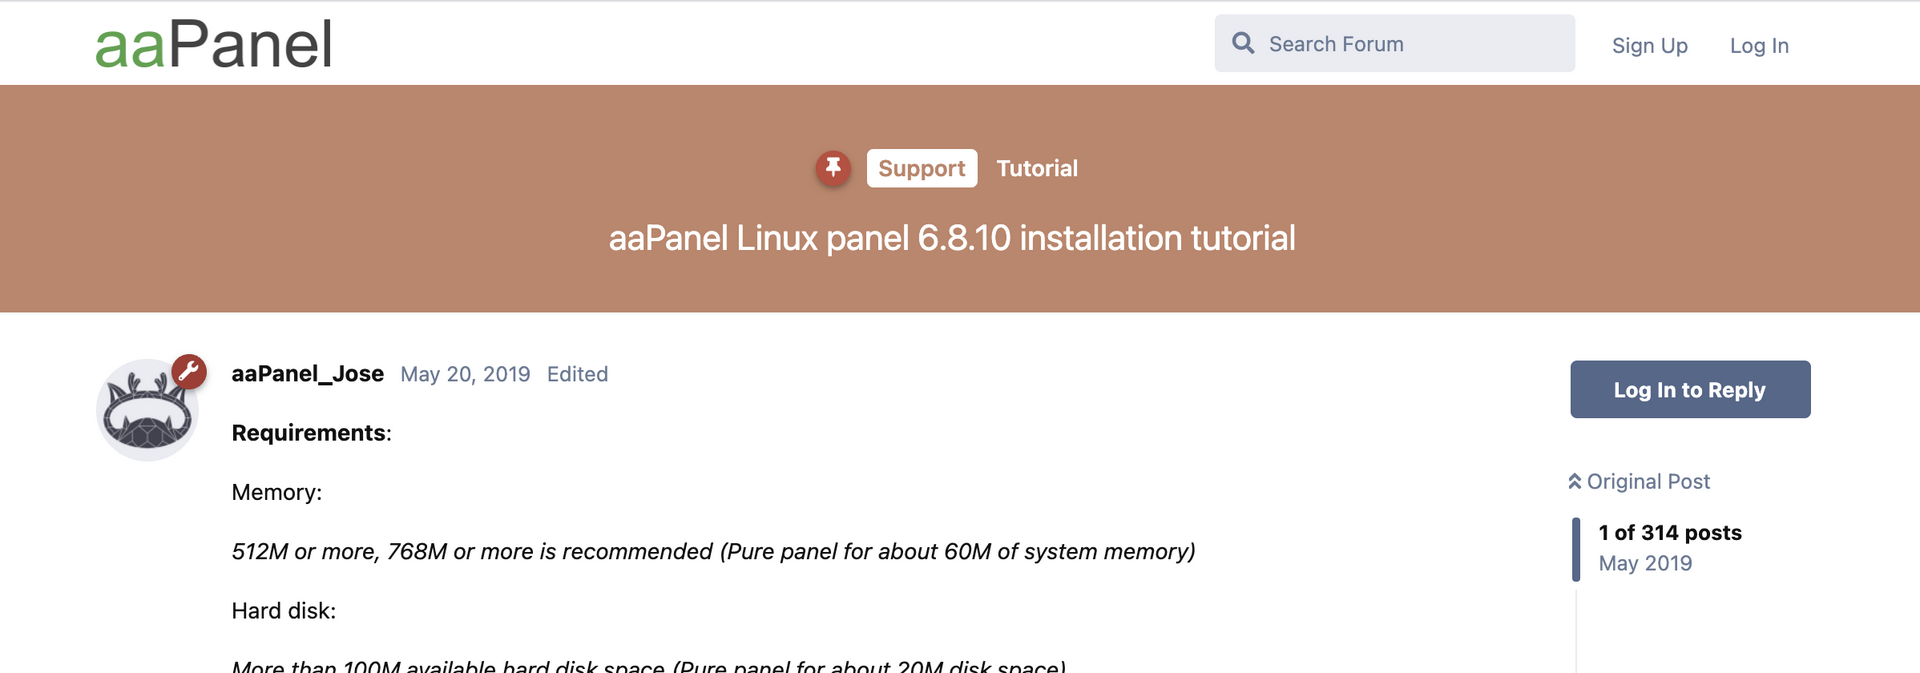
wget -O install.sh http://www.aapanel.com/script/install-ubuntu_6.0_en.sh && bash install.sh
地址:https://forum.aapanel.com/d/9-aapanel-linux-panel-6810-installation-tutorial
- 国内版本:
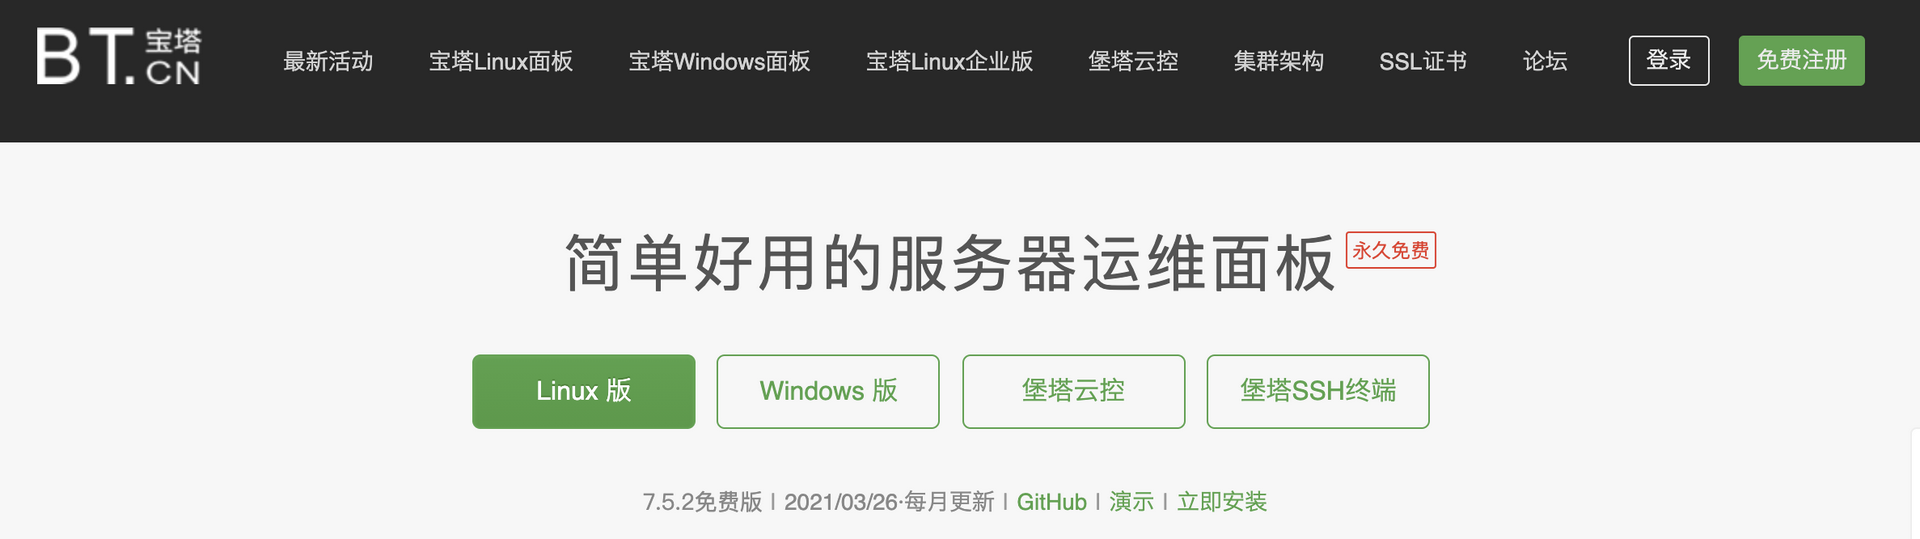
wget -O install.sh http://download.bt.cn/install/install-ubuntu_6.0.sh && bash install.sh
地址:https://www.bt.cn/bbs/thread-19376-1-1.html
中文版本输入下面的代码解除登陆限制
sed -i "s|if (bind_user == 'True') {|if (bind_user == 'REMOVED') {|g" /www/server/panel/BTPanel/static/js/index.js


rm -rf /www/server/panel/data/bind.pl
安装LNMP
php可以选7.4
修改系统时间、添加SWAP
时间改成上海,swap添加一倍内存就行。
安装Aria2增强版
为了避免出错,安装下面的基础组件:
apt install sudo wget curl ca-certificates
运行安装脚本
wget -N git.io/aria2.sh && chmod +x aria2.sh
启动Aria2
./aria2.sh
配置Aria2
Aria2 一键安装管理脚本 增强版 [v2.7.4] by P3TERX.COM

  0. 升级脚本
 ———————————————————————
  1. 安装 Aria2
  2. 更新 Aria2
  3. 卸载 Aria2
 ———————————————————————
  4. 启动 Aria2
  5. 停止 Aria2
  6. 重启 Aria2
 ———————————————————————
  7. 修改 配置
  8. 查看 配置
  9. 查看 日志
 10. 清空 日志
 ———————————————————————
 11. 手动更新 BT-Tracker
 12. 自动更新 BT-Tracker
 ———————————————————————

 Aria2 状态: 已安装 | 已启动

 自动更新 BT-Tracker: 已开启

 请输入数字 [0-12]:
配置信息:
Aria2 简单配置信息:

 IPv4 地址      : 119.28.139.167
 IPv6 地址      : IPv6 地址检测失败
 RPC 端口       : 6800
 RPC 密钥       : 43aa91a8314b404d513d
 下载目录       : /root/downloads
 AriaNg 链接    : http://ariang.js.org/#!/settings/rpc/set/ws/119.28.139.167/6800/jsonrpc/NDNhYTkxYT
gzMTRiNDA0ZDUxM2Q=

[信息] Aria2 启动成功 !
项目仓库:https://github.com/P3TERX/aria2.sh
其他操作
启动:/etc/init.d/aria2 start
停止:/etc/init.d/aria2 stop
重启:/etc/init.d/aria2 restart
查看状态:/etc/init.d/aria2 status
配置文件路径:/root/.aria2c/aria2.conf (配置文件有中文注释,若语言设置有问题会导致中文乱码)
默认下载目录:/root/downloads
RPC 密钥:随机生成,可使用选项7. 修改 配置文件自定义
安装Docker
curl -fsSL https://get.docker.com/ | sh


sudo systemctl start docker


sudo systemctl enable docker
安装filebrowser
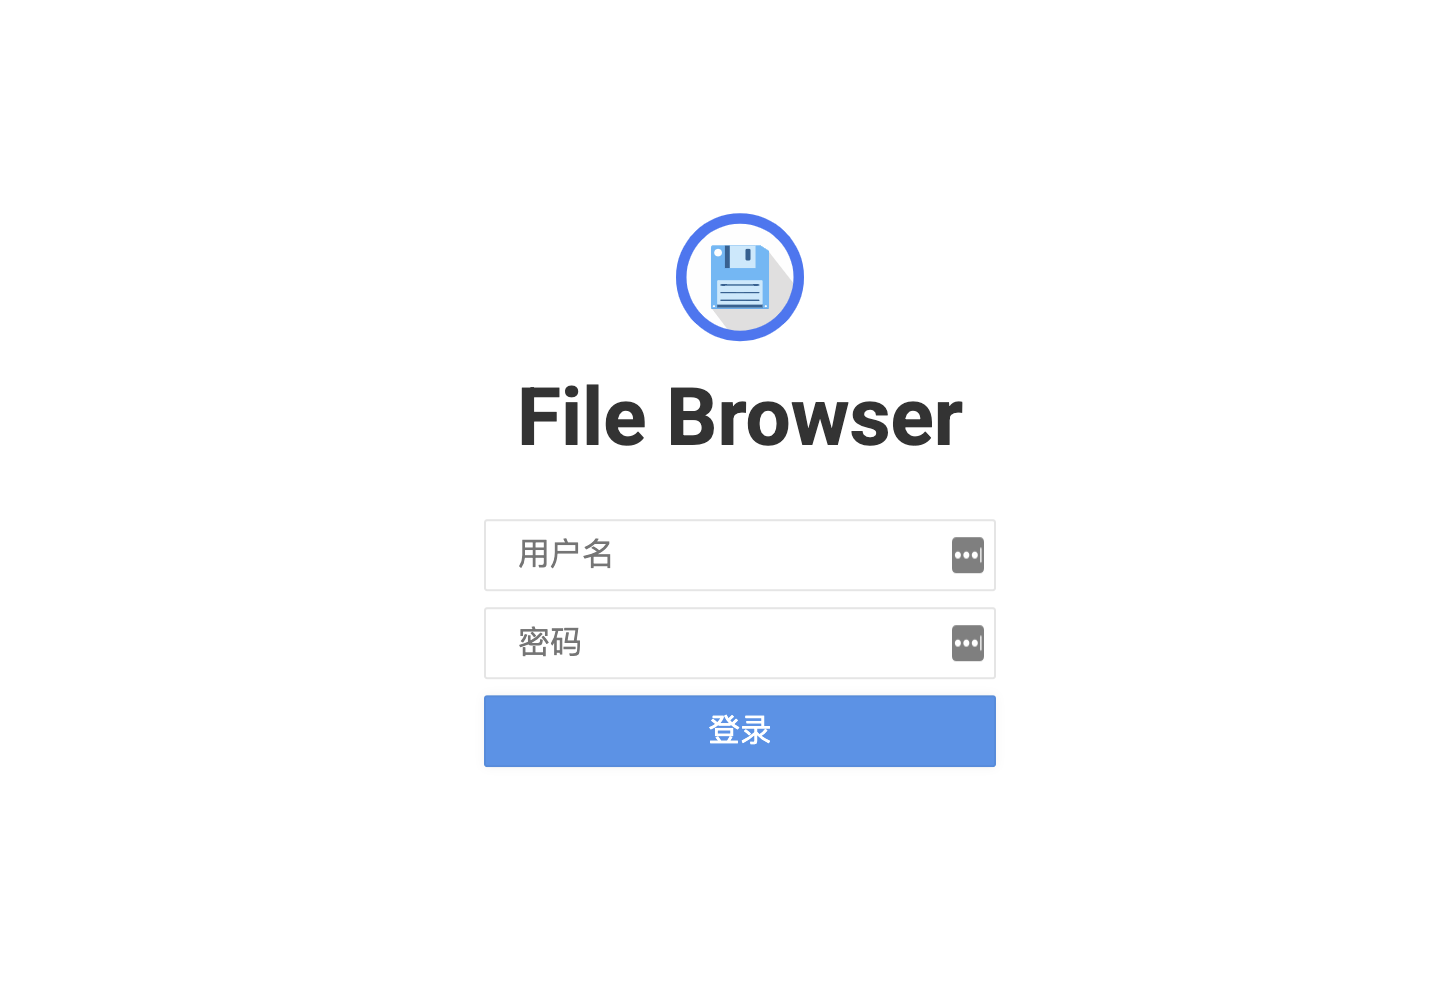
下载filebrowser镜像
docker pull filebrowser/filebrowser
创建filebrowser挂载所需要的目录
mkdir /root/filebrowser
启动filebrowser
docker run -d -v /root/downloads:/srv -v /root/filebrowser/filebrowserconfig.json:/etc/config.json -v /root/filebrowser/database.db:/etc/database.db --name myfile -p 8002:80 filebrowser/filebrowser
通过浏览器访问,默认账号密码:admin
反向代理
 location / {
    proxy_pass http://127.0.0.1:8002/;
    rewrite ^/(.*)$ /$1 break;
    proxy_redirect off;
    proxy_set_header Host $host;
    proxy_set_header X-Forwarded-Proto $scheme;
    proxy_set_header X-Real-IP $remote_addr;
    proxy_set_header X-Forwarded-For $proxy_add_x_forwarded_for;
    proxy_set_header Upgrade-Insecure-Requests 1;
    proxy_set_header X-Forwarded-Proto https;
  }
配置Rclone(以下来自twovps的教程整理)
以下分为三小步这里做个简介:第一步是PC端获取网盘授权的令牌;第二步是在VPS里绑定获得的授权;第三步才是自动上传配置。因为OneDrive的授权需要在浏览器打开,而VPS没有图形界面,只能先在PC端获取授权,所以第一步和第二步有点重复。
1、窗口(PC)端安装Rclone
登录Rclone网官下载Rclone的窗户端的客户。
下载解压将里面的rclone.exe移动到本地C:\Windows\System32下这个目录,其它的可以删掉没关系
按win + R快捷键打开运行,输入cmd确定来打开CMD窗口,输入下面命令开始配置 。
rclone config
然后出现如下界面,提示按输入n回车创建个新的远程,然后提示输入name,名称随意但要记住,这里我填remote。
Current remotes:

Name                 Type
====                 ====
onedrive             onedrive

e) Edit existing remote
n) New remote
d) Delete remote
r) Rename remote
c) Copy remote
s) Set configuration password
q) Quit config
e/n/d/r/c/s/q> n
name> remote
回车后出现一长串网盘列表让你选,这里我们要绑定的是OneDrive, 其它网盘绑定教程我就不说了, 可以看到OneDrive是19,那就填入19回车,不同版本数字排序可能会变化,请自主确认(比如我们现在视频里的就是26,一定要看清楚!),你也可以绑定列表中其它网盘。
Current remotes:

Name                 Type
====                 ====
onedrive             onedrive

e) Edit existing remote
n) New remote
d) Delete remote
r) Rename remote
c) Copy remote
s) Set configuration password
q) Quit config
e/n/d/r/c/s/q> n
name> onedrive
Type of storage to configure.
Enter a string value. Press Enter for the default ("").
Choose a number from below, or type in your own value
 1 / A stackable unification remote, which can appear to merge the contents of several remotes
   \ "union"
 2 / Alias for a existing remote
   \ "alias"
 3 / Amazon Drive
   \ "amazon cloud drive"
 4 / Amazon S3 Compliant Storage Provider (AWS, Alibaba, Ceph, Digital Ocean, Dreamhost, IBM COS, Minio, etc)
   \ "s3"
 5 / Backblaze B2
   \ "b2"
 6 / Box
   \ "box"
 7 / Cache a remote
   \ "cache"
 8 / Dropbox
   \ "dropbox"
 9 / Encrypt/Decrypt a remote
   \ "crypt"
10 / FTP Connection
   \ "ftp"
11 / Google Cloud Storage (this is not Google Drive)
   \ "google cloud storage"
12 / Google Drive
   \ "drive"
13 / Hubic
   \ "hubic"
14 / JottaCloud
   \ "jottacloud"
15 / Koofr
   \ "koofr"
16 / Local Disk
   \ "local"
17 / Mega
   \ "mega"
18 / Microsoft Azure Blob Storage
   \ "azureblob"
19 / Microsoft OneDrive
   \ "onedrive"
20 / OpenDrive
   \ "opendrive"
21 / Openstack Swift (Rackspace Cloud Files, Memset Memstore, OVH)
   \ "swift"
22 / Pcloud
   \ "pcloud"
23 / QingCloud Object Storage
   \ "qingstor"
24 / SSH/SFTP Connection
   \ "sftp"
25 / Webdav
   \ "webdav"
26 / Yandex Disk
   \ "yandex"
27 / http Connection
   \ "http"
Storage> 19
接着client_id和client_secret 直接不填回车
Edit advanced config? 输入n回车
Already have a token - refresh? 输入y回车,后面VPS里配置时是没有这个提示的,会出现下个自动配置选项,别手快直接y
Use auto config? 这里输入y回车,后面VPS配置时这步要选 n
具体操作如下:
Microsoft App Client Id
Leave blank normally.
Enter a string value. Press Enter for the default ("").
client_id>
Microsoft App Client Secret
Leave blank normally.
Enter a string value. Press Enter for the default ("").
client_secret>
Edit advanced config? (y/n)
y) Yes
n) No
y/n> n
Remote config
Already have a token - refresh?
y) Yes
n) No
y/n> y
Use auto config?
 * Say Y if not sure
 * Say N if you are working on a remote or headless machine
y) Yes
n) No
y/n> y
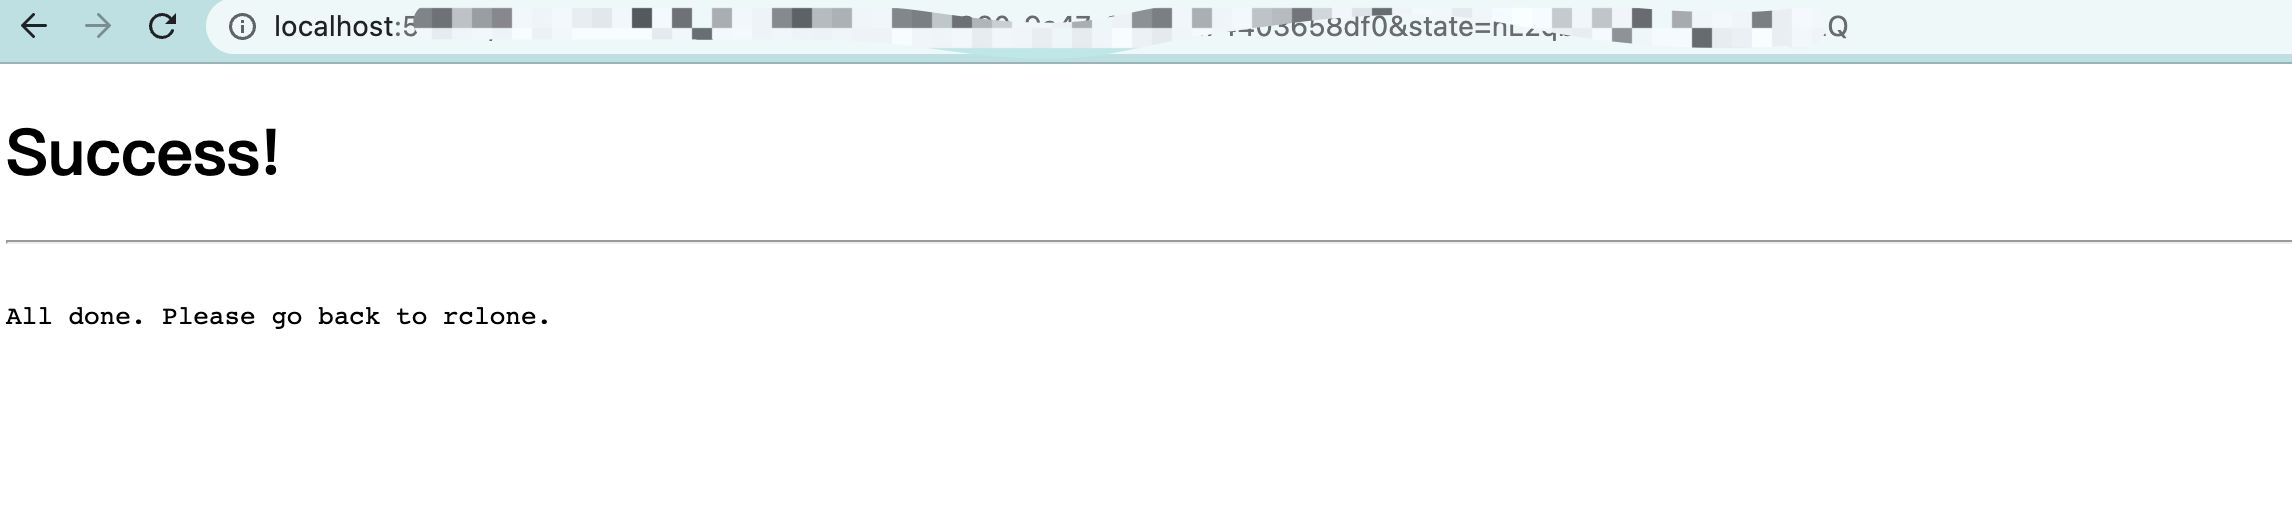
接着浏览器会自动弹出窗口,然后登录你要挂载的OneDrive账号,征求许可接受就行了,出现下图界面授权成功。
授权成功后返回cmd窗口出现以下界面,这里选1回车。
Choose a number from below, or type in an existing value
 1 / OneDrive Personal or Business  #个人和商用
   \ "onedrive"
 2 / Root Sharepoint site
   \ "sharepoint"
 3 / Type in driveID
   \ "driveid"
 4 / Type in SiteID
   \ "siteid"
 5 / Search a Sharepoint site
   \ "search"
Your choice>1
提示找到一个驱动器,让你选择,这里就一个选项 0,那就填入0回车,然后问你是否确定,选y回车。
Found 1 drives, please select the one you want to use:
0: OneDrive (business) id=huioaeuiaeagioioieuiaaefe@#%gaege94#
Chose drive to use:>0
Found drive 'root' of type 'business', URL:https://jxjjxy-my.sharepoint.com/personal/meeaghvp_t_odmail_cn/Documents
Is that okay?
y) Yes
n) No
y/n> y
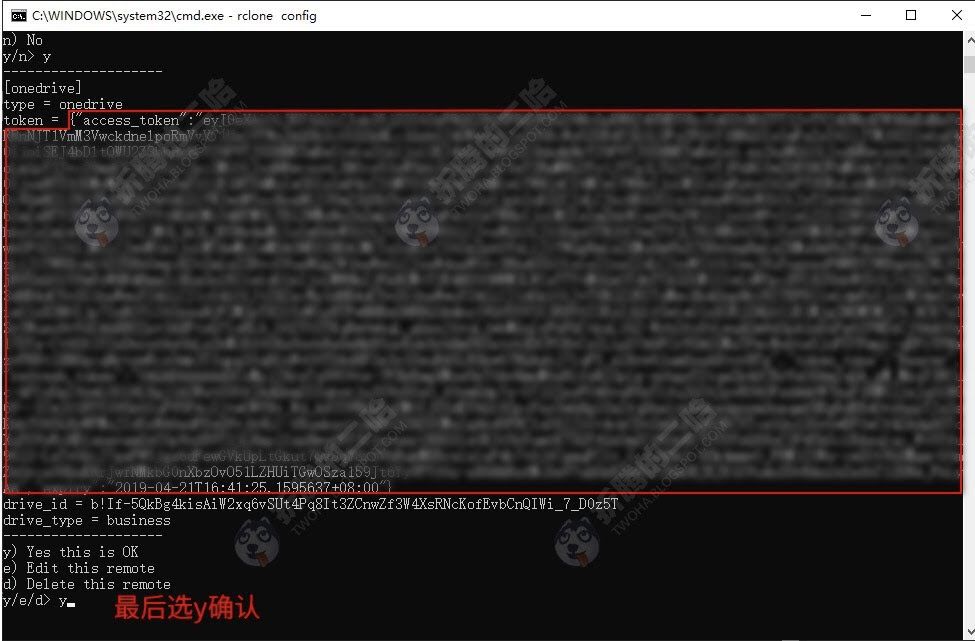
接着会出现一串长令牌,PC端的操作全是为了这个令牌,将下图红框内的整个复制,复制范围{"access_token":…………………………2019-04-21T16:41:25.1595637+08:00"}保存好,以后就可以省了这步PC端操作,下面就回到SSH操作。
2 、VPS安装Rclone
curl https://rclone.org/install.sh | sudo bash  #安装Rclone
rclone config  #配置Rclone
上面输入完rclone config回车后的过程跟前面在PC端的配置步骤基本一样,这里就不复述了,到了Use auto config?问你是否使用自动配置这步不同,这里选n 回车,然后在出现的result>后面粘贴上前面获得的token然后回车,接着会有几个确认,按提示填y就行,直到又回到下图配置开头界面,输入q回车退出配置即可,到此我们完成了网盘的授权。
Name                 Type
====                 ====
onedrive             onedrive

e) Edit existing remote
n) New remote
d) Delete remote
r) Rename remote
c) Copy remote
s) Set configuration password
q) Quit config
e/n/d/r/c/s/q> q
提示:
以上两步就是为了得到token,并在VPS里创建一个rclone.conf配置文件,该配置文件目录在root/.config/rclone/rclone.conf,可以将这个文件下载到本地,以后如果重装只要在VPS上安装好rclone,再将这个配置文件放进这个目录即可,省去繁琐配置过程。
3、自动上传设置
因为挂载了其实最终的目的还是转移到自己的云盘空间中,vps 的硬盘能有多大,要折腾都是在云盘中。如果你是土豪当我没说。
这篇手记是解决后续利用 rclone 自动上传 aria2 下载的文件到 onedrive 或者 googledrive。到 aria2 的目录创建脚本:
vi autoupload.sh
脚本如下(作者:P3TERX,Github页面地址):
#!/bin/bash
#=================================================
# Description: Aria2 download completes calling Rclone upload
# Lisence: MIT
# Version: 1.8
# Author: P3TERX
# Blog: https://p3terx.com
#=================================================

downloadpath='/usr/local/caddy/www/file' #Aria2下载目录
name='remote' #配置Rclone时填写的name
folder='/backup' #网盘里的文件夹,留空为整个网盘。
retry_num=3 #上传失败重试次数

#=================下面不需要修改===================
filepath=$3 #Aria2传递给脚本的文件路径。BT下载有多个文件时该值为文件夹内第一个文件,如/root/Download/a/b/1.mp4
rdp=${filepath#${downloadpath}/} #路径转换,去掉开头的下载路径。
path=${downloadpath}/${rdp%%/*} #路径转换。下载文件夹时为顶层文件夹路径,普通单文件下载时与文件路径相同。

Task_INFO(){
echo
echo -e "[\033[1;32mUPLOAD\033[0m] Task information:"
echo -e "————————– [\033[1;33mINFO\033[0m] ————————–"
echo -e "\033[1;35mDownload path:\033[0m${downloadpath}"
echo -e "\033[1;35mFile path: \033[0m${filepath}"
echo -e "\033[1;35mUpload path: \033[0m${uploadpath}"
echo -e "\033[1;35mRemote path:\033[0m${remotepath}"
echo -e "————————– [\033[1;33mINFO\033[0m] ————————–"
echo
}

Upload(){
retry=0
while [ $retry -le $retry_num -a -e "${uploadpath}" ]; do
[ $retry != 0 ] && echo && echo -e "Upload failed! Retry ${retry}/${retry_num} …" && echo
rclone move -v "${uploadpath}" "${remotepath}"
rclone rmdirs -v "${downloadpath}" –leave-root
retry=$(($retry+1))
done
[ -e "${uploadpath}" ] && echo && echo -e "Upload failed: ${uploadpath}" && echo
[ -e "${path}".aria2 ] && rm -vf "${path}".aria2
[ -e "${filepath}".aria2 ] && rm -vf "${filepath}".aria2
}

if [ $2 -eq 0 ]
then
exit 0
fi

echo && echo -e " \033[1;33mU P L O A D ! ! !\033[0m" && echo
echo && echo -e " \033[1;32mU P L O A D ! ! !\033[0m" && echo
echo && echo -e " \033[1;35mU P L O A D ! ! !\033[0m" && echo

if [ "$path" = "$filepath" ] && [ $2 -eq 1 ] #普通单文件下载,移动文件到设定的网盘文件夹。
then
uploadpath=${filepath}
remotepath="${name}:${folder}"
Task_INFO
Upload
exit 0
elif [ "$path" != "$filepath" ] && [ $2 -gt 1 ] #BT下载(文件夹内文件数大于1),移动整个文件夹到设定的网盘文件夹。
then
uploadpath=${path}
remotepath="${name}:${folder}/${rdp%%/*}"
Task_INFO
Upload
exit 0
elif [ "$path" != "$filepath" ] && [ $2 -eq 1 ] #第三方度盘工具下载(子文件夹或多级目录等情况下的单文件下载)、BT下载(文件夹内文件数等于1),移动文件到设定的网盘文件夹下的相同路径文件夹。
then
uploadpath=${filepath}
remotepath="${name}:${folder}/${rdp%/*}"
Task_INFO
Upload
exit 0
fi
Task_INFO
需要修改的地方只有这三行:
downloadpath='/usr/local/caddy/www/file' #Aria2下载目录
name='remote' #配置Rclone时填写的name
folder='/backup' #网盘里的文件夹,留空为整个网盘。
/usr/local/caddy/www/file 这个对应你aria2的下载目录(比如用我们的的增强脚本就是/root/downloads),remote 对应你配置rclone的时候设置的名称,/backup 对应你想同步上传到你网盘的哪个目录,如果留空就是根目录(如果没有这个目录,会自动创建)。
修改完毕后,给这个脚本执行权限:
chmod +x autoupload.sh
然后编辑aria2的配置文件(位置在/root/.aria2c),
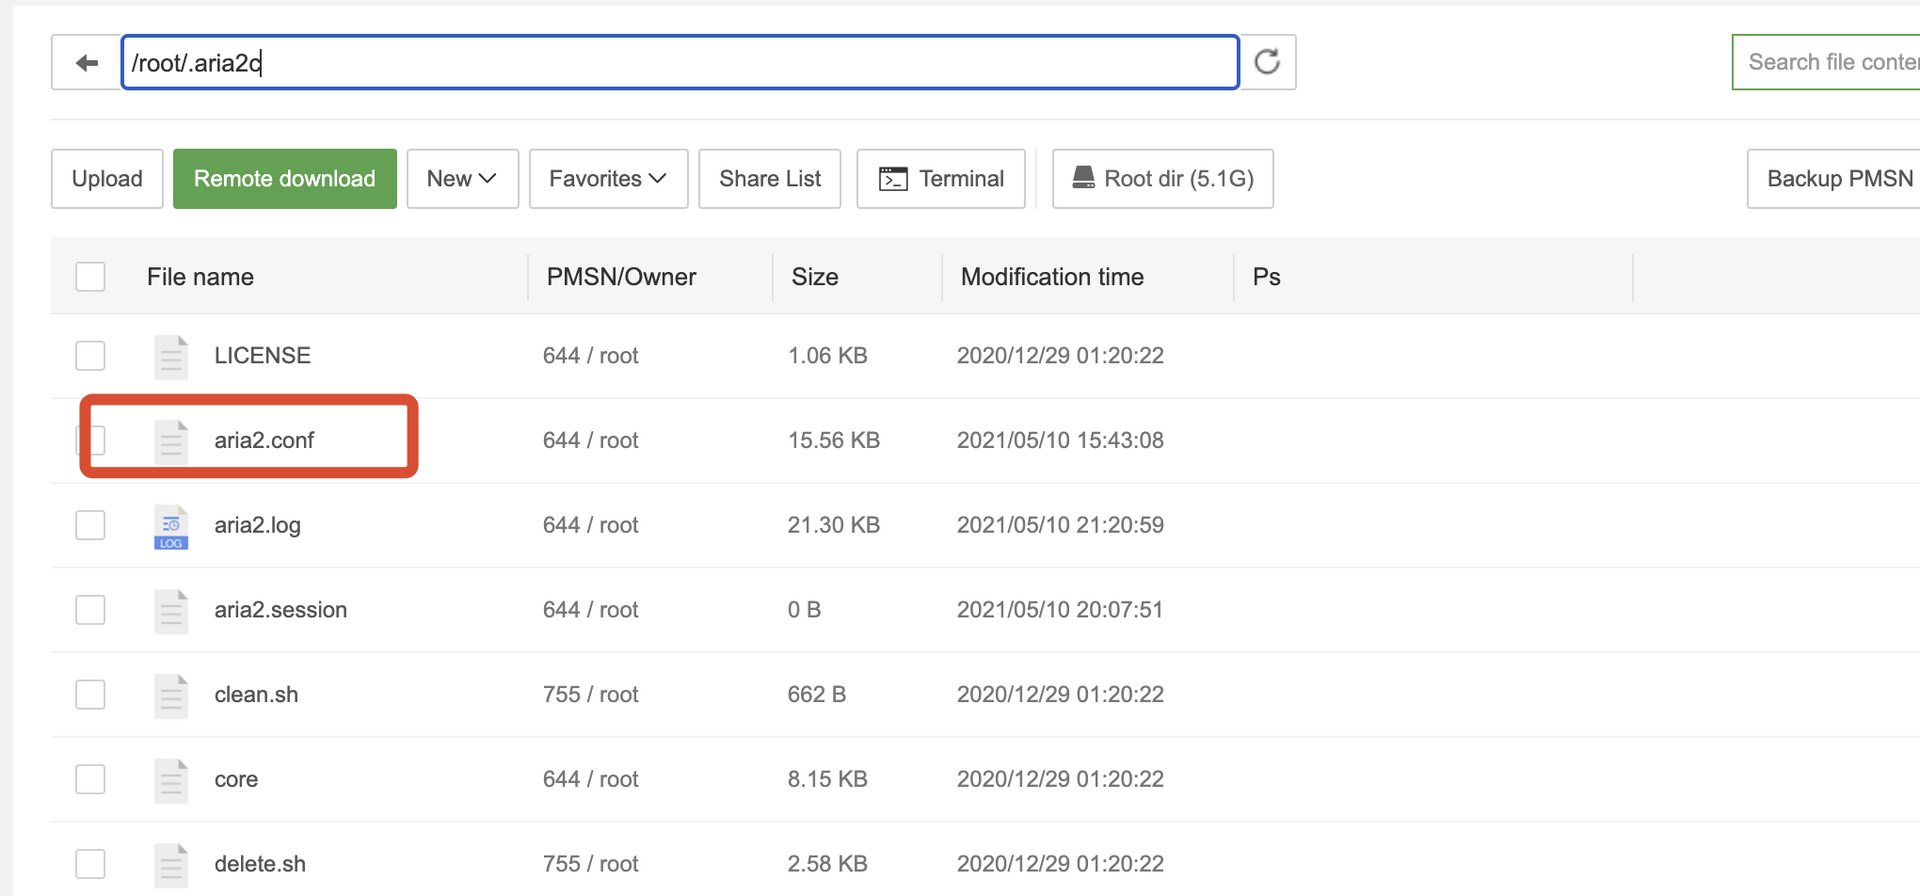
找到on-download-complete,修改内容为这句:
# 调用 rclone 上传(move)到网盘
on-download-complete=/root/.aria2c/autoupload.sh
网友反馈
# 调用 rclone 上传(move)到网盘
on-download-complete=/root/autoupload.sh
这就是利用rclone的on-download-complete自动上传aria2下载好的文件。
重新启动aria2:
/etc/init.d/aria2 restart
重启Aria2使配置文件生效,这样就大功告成了。
最后推荐下我现在在用的大硬盘VPS,512M内存挂载250G硬盘,每月20RMB(支付宝支付3.25加拿大元=17.24元)都不到,就是经常缺货不容易买到。
最后
大家有什么问题,欢迎在留言区提出来。


评论区